
Verdict
Meshy AI is a powerful, fast solution for creating high-quality 3D models and textures. It's an excellent tool for beginners and professionals with its easy-to-navigate interface and customizable options.
Pros and Cons
- Generates 3D models and textures in minutes rather than days or hours.
- An intuitive interface that simplifies the 3D creation process for beginners and professionals.
- Produces high-quality, customizable PBR textures and realistic 3D models.
- Supports various art styles and export formats for broad usability.
- Multiple generation modes(Text to 3D, Image to 3D, and Text to Texture).
- Allows for custom integrations through its API, extending the tool's usability beyond standalone use.
- Addresses issues like high poly counts and poor UV unwrapping that are common in other AI-generated models for improved mesh quality.
- 3-day free trial.
- You may need time to get accustomed to formulating effective prompts.
- The generated models may require additional tweaking for professional-level work.
- Higher-quality outputs or increased usage may require additional financial investment.
What is Meshy AI?
Meshy-3 is Here: Ultra Realistic Sculptures, PBR, and New Image to 3D Pipeline
Meshy AI is an AI-powered 3D model generator that quickly creates 3D assets from text prompts or images. This allows artists, game developers, and other creators to rapidly produce 3D assets without extensive manual modeling!
Think of it like DALL-E or Midjourney, but instead of spitting out 2D images, you get fully-textured 3D models that you can use in your projects.
Here's the really cool part about how Meshy AI works. When you type in a prompt (e.g. “weathered wooden rocking chair with intricate carvings,”) Meshy AI's technology understands both the geometry and materials of objects, creating realistic 3D models with proper depth, textures, and lighting!
The process happens in three main steps:
- Text analysis and understanding (using large language models)
- Generation of a basic 3D structure
- Refinement of details and textures
What sets Meshy AI apart from other tools is its ability to handle complex geometries and its realistic texture generation. While tools like Point-E or GET3D struggle with intricate details, Meshy AI manages to nail those little nuances that make 3D models look realistic.
One thing that really impressed me was their focus on optimization. The 3D models come out remarkably clean and ready for real-world applications.
Meshy AI can export in various formats including .fbx, .obj, and .glb, with texture maps included. The models typically come with reasonable poly counts that are not too heavy to work with, but detailed enough to look good up close!
Who is Meshy AI Best For?
Here’s a breakdown of who benefits the most from using Meshy AI:
- Game developers can use Meshy AI to quickly generate characters, environments, and props to significantly speed up the asset creation process. It's great for creating prototypes of game elements without extensive manual modeling.
- Digital artists can use Meshy AI to explore new styles and concepts without needing advanced 3D modeling skills. The tool produces customizable PBR textures and realistic models to enhance your projects.
- Architects and interior designers can use Meshy AI to create 3D models of their designs and visualize spaces before actual construction or renovation.
- Educators can use Meshy AI to teach 3D modeling concepts to students with no prior experience.
- Students can experiment with creating models to foster their creativity and technical skills in design.
- Hobbyists can use Meshy AI to test ideas or create personal projects without extensive training or investment in expensive software.
- Fashion industry professionals can use Meshy AI to create virtual mockups of clothing and accessories to streamline the design process.
- Film industry creatives can use Meshy AI to generate sets and props digitally before production begins for more effective scene planning.
Meshy AI Key Features
Here are Meshy AI's key features.
Text to 3D

Meshy’s “Text to 3D” feature opens up a world of rapid, high-quality 3D creation. It turns simple text prompts into vibrant models in minutes!
Whether you’re looking to bring a Pixar-inspired character to life, design a stylized greenskeeper plushie, or create a game-ready pirate axe with intricate skull details, Meshy lets you conceptualize, iterate, and experiment with incredible speed and precision. The diverse model options mean there’s something for every creator’s imagination!
Meshy AI supports several popular art styles like Realistic, Cartoon, Low Poly, and Voxel. You'll also have full control over polycount and mesh conversion between triangles and quads.
Meshy AI also offers texture richness adjustments, so you'll have full control over the final look and feel. Its AI-powered texture editing allows quick fixes and enhancements to specific areas for a polished final product.
Image to 3D

Imagine breathing life into your favorite characters, props, or design elements. With Meshy's “Image to 3D” feature, turn your 2D images into 3D characters with an unprecedented level of realism in one minute!
The AI-generated 3D models generated with Meshy AI showcase incredibly intricate textures and shapes, bringing out the finest details with a lifelike quality.
Precision is key to making your 3D models look believable, and “Image to 3D” makes sure each edge is razor-sharp and defined. This clarity gives models depth and dimension, making the edges pop.
This tool also transforms images into 3D objects with accurate geometry. Models appear clean, proportionate, and true to form. You’ll get results that accurately represent the original image!
High fidelity is at the heart of this feature, replicating even the most intricate shapes and textures of your original image. The streamlined process makes turning concept art into a high-quality 3D model effortless so you can focus more on the creative process.
Text to Texture

“Text to Texture” lets you create detailed textures for any 3D model in seconds using text prompts! Describe what you want to create and the AI will generate a beautifully textured model in under a minute. It will come complete with PBR (Physically-Based Rendering) maps for color, metallic, roughness, and normal details.
This feature also supports a wide range of styles, including hyper-realistic, hand-drawn, Oriental comic ink shading, and stylized cartoon looks. Text to Texture gives you creative freedom to explore popular art styles easily!
Animation

Meshy brings animation to life with a powerful, intuitive platform, perfect for creators of all levels. With its user-friendly interface and advanced tools, Meshy makes building animated characters an easy, creative experience without extensive technical know-how.
You can create characters instantly in a wide variety of styles, like whimsical cartoons, lifelike renderings, historical figures, and sci-fi. Meshy’s versatile character creation tools adapt to any style or story.
For rigging, Meshy ensures smooth animation every step of the way backed by an extensive animation library filled with preset movements. Dynamic animations can be added in just a few clicks, making it easier than ever to bring your characters to life!
Model Types & Styles
When it comes to model types, Meshy AI is pretty versatile.
Here's what you can create:
- Furniture (perfect for interior design projects)
- Props and decorative items
- Organic objects like plants and trees
- Basic architectural elements (walls, roofs, etc.)
- Characters (great for games and animations)
- Vehicle exteriors (cars, boats, etc.)
- Environmental assets (terrain, buildings, etc.)
Textures & Materials
The texture and material system is where things get really interesting!
You can choose from several base material types:
- Metals
- Fabrics
- Wood
- Glass
- Various synthetics
What blew my mind was discovering you can actually blend materials! For example, if you're designing a furniture piece, you can blend metal and fabric elements. The textures are impressively realistic with high-quality outputs!
Meshy AI also offers both text-to-texture and image-to-texture functionalities. This flexibility allows you to generate textures based on descriptive prompts or concept art.
Not to mention, the tool includes settings like Texture Richness to control texture quality based on the model's shape and style. This ensures that the final output meets your expectations for realism and detail.
Export Formats & Compatibility
Export-wise, Meshy AI offers all the standard formats:
- .fbx (fully rigged if needed)
- .obj with separate material files
- .glb for web use
- .usdz for AR applications
- .stl (useful for 3D printing applications)
- .blend files (though these sometimes need tweaking)
Remember to always check your texture maps after export. Sometimes the normal maps need a quick adjustment in your preferred texture software. It's worth the extra five minutes to avoid weird lighting issues down the line.
Integrations with Other 3D Software
Meshy + Blender: Stylized AI Texturing for Blender models
You can use Meshy AI models in the following 3D software:
- A dedicated plugin for Blender (it's free and great for tweaking)
- Maya
- Unity
- Unreal Engine
- SketchUp
- Rhino
Textures up to 4K
Material-wise, each model supports up to 4K textures, including:
- Diffuse/Albedo maps
- Normal maps
- Roughness maps
- Metallic maps
- Ambient Occlusion
- Emission maps (great for screens or glowing elements)
How to Use Meshy AI
Here's how I used Meshy AI to generate a modern dining chair with cognac leather upholstery in minutes:
- Create a Meshy AI Account
- Select “Text to 3D”
- Add a Text Prompt
- Choose the AI Model & Art Style
- Choose the Target Polycount & Generation Detail
- Choose the Topology & Symmetry
- Generate!
- Add a Texture
- Download
Step 1: Create a Meshy AI Account
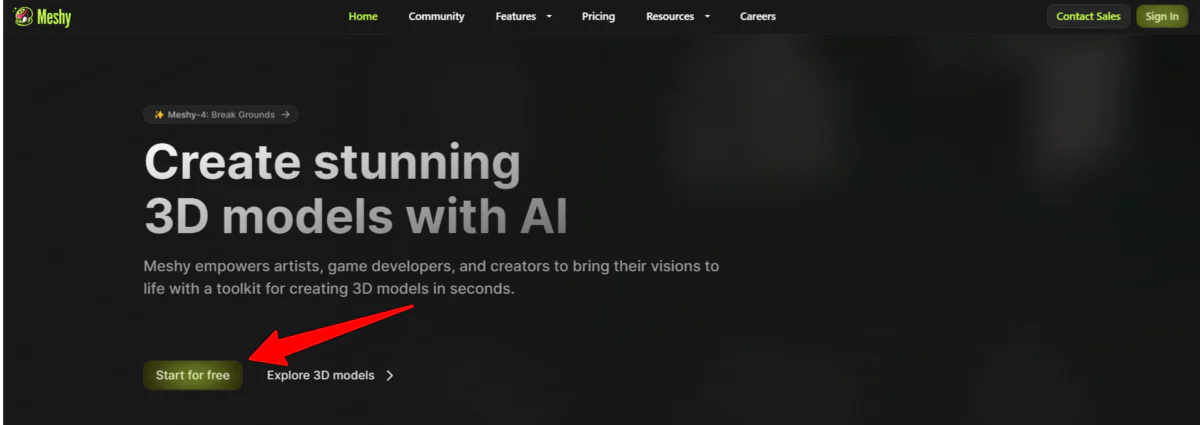
I started by going to meshy.ai and selecting “Start for free.”
Step 2: Select “Text to 3D”

After creating an account, Meshy granted me a 3-day free trial of all the premium features! I was taken to my Meshy dashboard and selected “Text to 3D.”
Step 3: Add a Text Prompt

The first thing you need to do is add a text prompt. Prompt engineering in Meshy is absolutely crucial. If you need help with prompt engineering, check out Meshy's official prompt guidelines!
Here's my formula for writing effective prompts:
- Start with the basic object type
- Add specific material details
- Include style keywords
- Specify any unique features
- Add technical requirements if needed
Here's a real example that works great:
“Modern dining chair, matte black powder-coated steel frame, cognac leather upholstery, minimalist design, ergonomic back support, suitable for commercial use”
I added this text prompt to the empty field.
Step 4: Choose the AI Model & Art Style

For the AI Model, I went with Meshy's latest version: “Meshy-4.” I also chose “Realistic” as the art style.
Step 5: Choose the Target Polycount & Generation Detail

For the Target Polycount, I had two options:
- Adaptive: Automatically sets the target polycount based on the model's structure.
- Fixed: Maintains a constant target polycount, regardless of the model's structure.
I kept this on “Adaptive” and the generation detail on “High.”
Step 6: Choose the Topology & Symmetry

Next, I chose my Topology. There were two to choose from:
- Quad: Create evenly distributed quad faces for editing, with lower detail at a set polycount.
- Triangle: Produce optimized triangle faces tailored for game engines, enhancing detail at a given polycount. This option is more challenging to edit.
I selected “Quad” and kept the Symmetry on “Auto.” From there, I hit “Generate!”
Step 7: Generate!

About a minute later, Meshy AI generated four models that matched what I was envisioning!
I selected the model I liked most to preview it in the far right panel. Beneath my selected model, I hit “Texture” to add a texture!
Step 8: Add a Texture

Immediately, Meshy began generating a texture! Once my texture was generated, I selected it to apply to my chair.
I was impressed by how realistic it looked and was happy that it matched my exact prompt description! Feel free to take advantage of the AI editing tools on the right to edit your texture and apply an animation.
Step 9: Download

Once you're satisfied with what you've created, hit the download icon.
The “Download Settings” window will appear where you can choose the mesh optimization setting (decreases the amount of triangles in the model for better performance).
You can also resize the model to real-world dimensions, choose the height, origin, and format.
Here are the formats you can export your model in:
- fbx
- obj
- gib
- usdz
- stl
- blend
Overall, Meshy AI made creating a realistic 3D model of a modern dining chair quick and easy! The steps were easy to follow and the customizable options gave me full control to create a high-quality model in minutes.
5 Tips for Prompt Engineering in Meshy AI
Sometimes things generated on Meshy don't work quite right. If you're getting weird results, try:
- Breaking down complex objects into simpler parts
- Being more specific about materials
- Using different synonyms for key terms
- Adjusting the complexity settings
- Meshy AI processes colors in a pretty specific way. Instead of saying “blue,” try using more specific terms like “navy blue” or “cobalt blue.” The results are usually much closer to what you're imagining.
Top 3 Meshy AI Alternatives
Here are the best Meshy AI alternatives I've tried.
Appy Pie

The first Meshy AI alternative I’d recommend is Appy Pie. Appy Pie is great because it allows anyone to turn simple images into impressive 3D models quickly!
Both platforms use AI to simplify content creation. However, they cater to different types of creators and projects.
Meshy AI focuses on generating detailed 3D models from text or images with features like PBR textures, animation libraries, and advanced rigging options. Meanwhile, Appy Pie is great for quickly transforming 2D images into 3D models with a user-friendly interface, real-time previews, and customizable output formats.
Meshy AI targets professionals and hobbyists in gaming, animation, and architecture with its extensive customization and high-quality outputs. Appy Pie prioritizes simplicity and accessibility which is more suitable for e-commerce, prototyping, and marketing applications. It also emphasizes quick generation and minimal learning curves so even beginners can create 3D assets.
If you're looking for a comprehensive tool to create high-quality, customizable 3D assets, choose Meshy AI. For a beginner-friendly platform to generate basic 3D models from 2D images, Appy Pie is your best bet!
Spline
Introducing Spline AI – Design in 3D using AI
The next Meshy AI alternative I’d recommend is Spline. I love Spline for its accessibility: it combines intuitive tools and the ability to create 3D designs directly in your browser!
Meshy AI focuses on generating high-quality 3D models and textures quickly using AI. It offers features like Text to 3D, Image to 3D, and customizable PBR textures. It excels at generating complex, realistic models quickly, with clean geometry and multiple export options excellent for game and film production.
Meanwhile, Spline stands out with its real-time collaboration tools, interactive 3D experiences, and features like physics simulations and drag-and-drop interactivity. This makes Spline a versatile tool for web designers and developers.
If you’re looking for fast 3D model generation with customizable textures, choose Meshy AI. If you want to collaborate in real time and design interactive 3D experiences, Spline is the perfect choice!
Masterpiece Studio
Masterpiece X – Generate. Use generative AI to create 3D models from text.
The final Meshy AI alternative I’d recommend is Masterpiece Studio. The coolest thing about Masterpiece Studio is its VR integration for effortlessly creating and customizing models!
While Meshy AI and Masterpiece Studio generate 3D models quickly, Meshy AI stands out with its high-quality, customizable PBR textures and multiple generation modes. Meanwhile, Masterpiece Studio’s VR-enabled editing tools and step-by-step guidance let you remix models directly in virtual reality without any 3D design skills!
Both platforms focus on accessibility: Meshy AI simplifies prompt-based generation, while Masterpiece Studio eliminates technical barriers with its browser-based creation and no hardware requirements. However, Masterpiece Studio takes customization further with its “creative slider” to create multiple variations.
Meshy AI is perfect if you're looking for fast, polished results with rich texture capabilities. Meanwhile, Masterpiece Studio feels like a creative co-pilot for experimenting and refining designs in an immersive, hands-on way.
For a platform that's good for generating realistic, ready-to-use 3D models, choose Meshy AI. For an intuitive VR-driven tool to refine and remix assets, choose Masterpiece Studio!

