As someone who went to school for graphic design and has spent countless hours mastering the complexities of Photoshop, I understand firsthand the steep learning curve and the meticulous nature of manual photo editing. As powerful as Photoshop's tools are, they come with a price: a significant investment of time and effort to achieve professional results.
I recently came across Dzine, which has been a game-changer. Dzine AI simplifies your creation process and accelerates repetitive tasks, allowing even novice users to produce high-quality, professional images in seconds.
It has plenty of cool features we'll explore that are simple to use, making you complete creative tasks ten times faster. Whether you're a professional graphic designer or running a small business wanting to improve your brand, Dzine has all the tools to simplify designing.
With Dzine, the days of spending hours tweaking images by hand or scratching your head for fresh ideas are gone. It blends artificial intelligence with user-friendly design controls to create eye-catching visuals quickly. Whether you're putting together something for social media, crafting a new logo, or snapping product photos that look professional and sharp, Dzine offers something for all creative projects!
I generated an image in seconds using Dzine's Text-to-Image feature. With only a few clicks, I swapped the white flower for a red one!

Pretty incredible, right? Skylar's AI tools are a massive game-changer for designers, photographers, business owners, and creatives who don't want to deal with the steep learning curves of complicated software. Later in this article, I'll show you how I did this and how you can, too!
In addition, I'll discuss Skylar AI, its features, and who it's best for. I'll finish the article by sharing my top three Dzine AI alternatives so you can be sure it's the right AI art generator for you! Let's take a look.
Verdict
Dzine is an innovative and user-friendly tool that streamlines the design process with high-quality image generation and photo editing capabilities. It's ideal for creatives of all experience levels. However, new users might find the extensive range of tools overwhelming, and images generated with the free plan come with a watermark.
Pros and Cons
- Quickly generate professional, eye-catching images in seconds.
- Accelerate repetitive creative tasks with Dzine tools rather than doing them manually.
- The interface is easy to navigate, enhancing ease of use and the user experience overall.
- The tools are easy to use regardless of how much experience you have with design.
- The image results are high-quality.
- Lots of user-friendly AI editing tools that simplify editing photos.
- The AI editing tools save a significant amount of time and are accurate.
- Access to a vast library of various styles to create different designs.
- There are plenty of resources and support, including YouTube tutorials and Discord.
- Batch jobs are available on the paid plans.
- Get 100 credits to try all of Dzine's tools for free!
- All of the tools may feel overwhelming for new users.
- A watermark on images generated with the free plan.
- Lacks a prompt helper for better prompt crafting.
What is Dzine?
How to Generate Stylized Images with AI in 1min
Dzine is an all-in-one image and design tool that uses generative AI to reduce repetitive work significantly. It's packed with innovative AI tools that anyone can use, like turning words into pictures and even changing flat designs into 3D models. It also has user-friendly editing tools like the AI Photo Filter to experiment with different styles, Object Remover, and more. With Dzine, anyone can create professional designs and images instantly!
Dzine has a wide range of uses, including but not limited to character design, print on demand, product photography, game assets creation, interior design, and creating marketing assets. For example, you can upload a simple 2D character sketch, and Dzine instantly turns it into 3D! I used the Text-to-Image tool for product photography and was blown away by the quality and accuracy of the photos.
So, whether you're drawing things up as a graphic designer, want to make quick and easy edits as a photographer, or run your own business and want to save on outsourcing, Dzine will make your design process smoother and help you get more done faster.
Who is Dzine Best For?
Dzine is a powerful tool for individual users and large businesses wanting to reduce their repetitive creative work time by 10x. However, there are certain types of people Dzine is best for:
- Graphic designers can use Dzine to automate their design process. Its seamless integration of artificial intelligence simplifies complex tasks, allowing designers to focus more on their creativity rather than struggling with technicalities. For example, designers can generate original, high-quality images from text prompts or instantly turn flat logos and designs into 3D.
- Photographers can use Dzine to edit their photos more easily and quickly with advanced artificial intelligence techniques. With Dzine photographers can streamline their editing workflow and get professional results in a fraction of the time. Whether replacing elements, removing backgrounds, or applying creative filters, Dzine offers a range of tools to elevate photographic content.
- Social media influencers and marketers can use Dzine to create engaging visual content that resonates with their audience. From generating eye-catching visuals for promotional campaigns to transforming mundane images into something captivating, Dzine empowers influencers to amplify their online presence.
- Businesses and agencies can use Dzine to tweak their images without outsourcing. They can quickly create designs that look like a professional did them, including social media posts, logos, product photos, and more.
- Artists can use Dzine to enhance their creative process and explore new possibilities. With Dzine's innovative features, artists can experiment with different styles, generate unique artworks from text descriptions, or transform their traditional artwork into digital masterpieces. For example, they can upload sketches and instantly turn them into art!
- Interior designers can use Dzine to visualize their room design concepts more efficiently. With Dzine users can upload sketches of their ideas and generate 3D renderings of spaces to explore various layouts and styles before implementation. From experimenting with color schemes to testing different furniture arrangements, Dzine provides a valuable tool for seamlessly bringing design ideas to life.
- Marketers can use Dzine to create and improve marketing materials to increase advertising effectiveness. For example, they can easily enhance images, turn logos from 2D to 3D, and more.
Dzine Features
Dzine has plenty of handy features for graphic designers, photographers, and creators to streamline workflows. I've listed them here, including how to use them:
- AI Photo Filter: Upload a photo, choose a style, and make adjustments to transform your photos into stunning artwork instantly. There are plenty of styles to choose from!
- 2D to 3D Converter: Upload a photo and choose a 3D effect to instantly turn your 2D artwork to 3D! This tool is great for exploring cartoon effects and logo variations.
- AI Design Sketch: Upload a sketch, choose a style, and modify it to create instant renderings. The renderings are high-quality and available in many styles. It's excellent for bringing interior design, fashion, and product sketches to life!
- Image to Prompt: Upload a photo, select “Auto Prompt” to automatically generate a written prompt from your image, and tailor the prompt generated to meet your requirements! Explore different styles, whether it's a landscape, object, or scene.
- AI Style Transfer: Upload an image, select a style, and use the sliders to make modifications. Turn sketches into images, convert 2D photos into 3D, and turn photos into paintings!
- Turn Sketch to Art: Upload a sketch, select “Image to Image,” and experiment with different art styles on the platform. This tool is excellent for creative exploration, creating custom gifts and merchandise, and visualizing interior design.
- AI Anime Filter: Upload a photo, choose an anime filter, and export and share your anime photos. This tool is excellent for turning pet photos and self-portraits into anime!
- AI Image Editor: Upload a photo and edit it with AI by adding and removing elements and replacing or deleting backgrounds. From there, add different styles and photo filters. This tool is excellent for experimenting with varying photo backgrounds and eliminating clutter!
- Add Object into Image: Upload an image, highlight the elements you want to modify, and write your idea with a prompt. This tool is excellent for changing clothes on models, adding exciting elements to product photos, and replacing the sky with AI!
- Remove Object from Image: Upload a photo and highlight what you want to remove. This tool helps erase watermarks and eliminate distractions, backgrounds, or unwanted objects from photos!
- Remove Background: Upload a photo, click the “Remove BG” button, and instantly replace the background with an uploaded image! Change the background to white, make it transparent, or use AI to generate an entirely new background!
- AI Combine Images: Upload your photos, position them as you want them to merge, and select a style. This tool is perfect for giving your backgrounds a fresh look, matching plain text with an image's style, and visualizing interior designs.
- AI Photo Enhancer: Upload a photo, select “Enhance,” and slide the toggle to control the amount of detail presented in the photo. This tool is handy for enhancing blurry photos found in old photographs or image details.
- AI Photo Expand: Upload an image, resize the image to your desired aspect ratio, and download the picture! This tool is excellent for turning square photos into horizontal or vertical formats, resizing images for social media, and widening the cropping for more context.
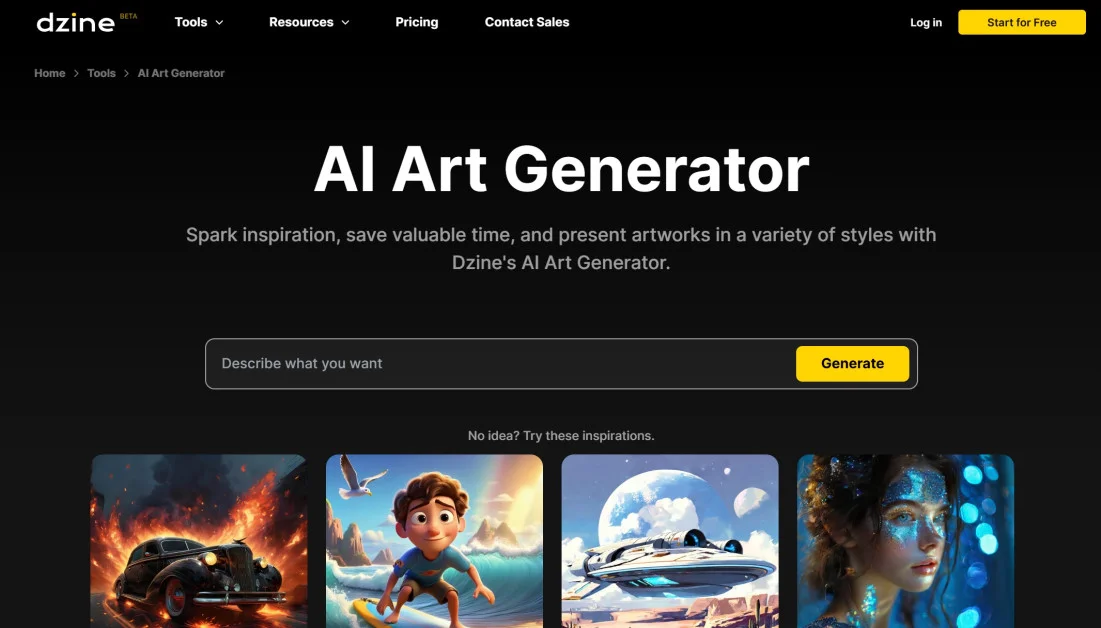
- AI Art Generator: Describe the image you want to generate, select a style, and develop an original image! You can apply different filters and effects to refine the aesthetic to look precisely how you want it. Dzine's AI Art Generator is perfect for creating dream characters and product designs and merging various art styles.
- Free Stable Diffusion 3: Write a prompt, choose an SD3 model, and hit “Generate.” Stable Diffusion 3 excels in generating highly detailed images with accurate results, so you can let your imagination run wild!
- AI Character Generator: Describe your character, choose a style, and generate your image! With this tool, you can create anime and fantasy game characters and even turn yourself into a fictional character by uploading a photo of yourself!
- AI Anime Generator: Describe the anime art you want to create, choose an art style, and generate your art! You can develop characters and a unique profile picture for social media and add anime filters.
- AI Comic Generator: Describe your story, select a comic style, and generate comics! You can even add text to your comic art. It's an excellent way to visualize your story and bring it to life in different comic styles!
- AI Portrait: Upload a selfie, turn on “Face Match,” and customize your portrait to be more professional or creative. From there, use Dzine's generative fill to change the clothing and background. You can also use image-to-image to blend your portrait into different settings and use face swap to swap faces with historical figures, celebrities, and friends.
- Face Swap: Create a new project, select “Face Swap,” and upload a photo of someone's face. Upload a second photo to the canvas to automatically swap faces with them! This tool generates professional headshots, turning you into a movie star or superhero or adding your face to memes.
- AI Avatar: Upload a photo of a person, choose a style, and generate an avatar! You can use these avatars in video games in different styles or wherever else you need avatars.
- AI Change Clothes: Upload a photo of yourself, decide whether you want to change your shirt, pants, or clothing color/design, and generate your clothing! This tool is a great way to share new styles on social media, explore your fashion sense, and refine the embellishments of your clothing.
- AI Logo: Describe the logo you'd like to make or upload a photo, hit generate, and select a style! With the wide range of options available, you'll quickly find a logo style that matches your brand. You can even turn your logo from 2D to 3D!
How to Use Dzine to Generate Images
Here's how easy it was for me to generate images with Dzine . I'll even show you how to use the editing tools!
- Sign Up for Dzine
- Select Text-to-Image
- Choose a Style
- Write a Prompt
- Optionally Write a Negative Prompt
- Select the Aspect Ratio
- Generate Images
- Make Edits
Step 1: Sign Up for Dzine

I started by going to the homepage and selecting “Start for Free.”
After signing up with my email, Dzine took me to the dashboard! I was also granted 100 credits to try Dzine's tools.
Step 2: Select Text-to-Image

The dashboard was easy to navigate. Dzine gave me the choice of starting with an image, creating a new project by choosing a size or selecting a tool.
I was curious about Dzine's Text-to-Image tool, so I selected it.
Step 3: Choose a Style

Selecting Dzines's Text-to-Image tool took me to the canvas. I could click or drag to upload an image to apply styles and make edits or get Dzine to generate one for me. I wanted to see what Dzine could develop, so I went to the Text-to-Image panel on the left!

Dzine had already selected a style and added a description for me. However, clicking on the style gave me access to Dzine's extensive style library.
I kept the style on “Sleek Simplicity,” but feel free to switch to a style that best suits your vision!
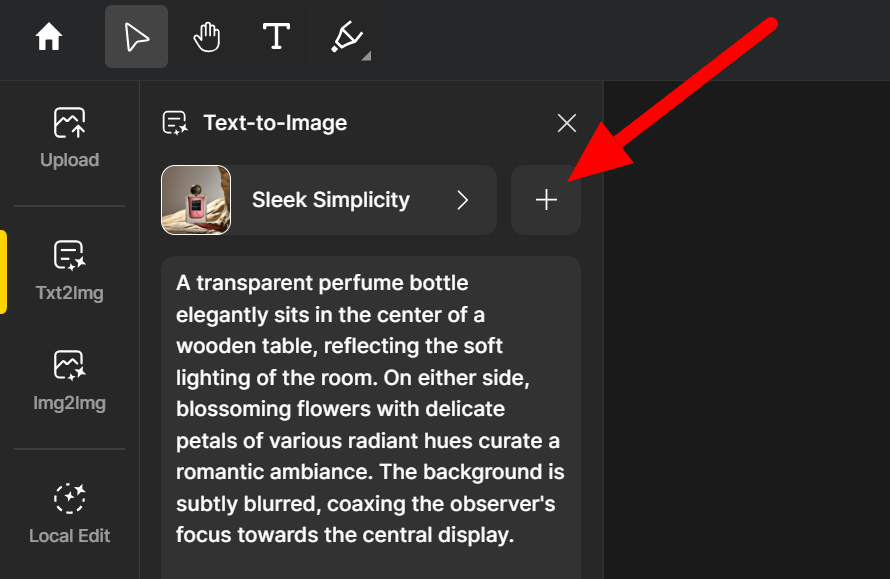
Note that by selecting the “+” icon next to the style, you can instantly swap a style by uploading a reference image or get the AI to learn a new style from reference images in minutes.
Step 4: Write a Prompt

Below the style options was the description Dzine automatically generated for me. I kept this as it was, but write a descriptive prompt that matches what you want to create. Note that the description cannot exceed 800 characters in length.
Beneath that was the Style Intensity. I kept this on default to see the results, but feel free to play around with this toggle to control the style intensity in your results.
Step 5: Optionally Write a Negative Prompt

Next was “Advanced,” which opened a new window where I could add a negative prompt describing what I didn't want to see in my generation. I kept this blank, but take advantage of this feature if your images start generating elements you don't like.
Step 6: Select the Aspect Ratio

Before generating my image, I selected “Untitled” at the top of the canvas to name my project and choose my canvas dimensions for various mediums. Once again, I kept this all on default, but choose a name that suits what you're creating and select the appropriate aspect ratio.
Dzine offers the most common aspect ratios, which are perfect for social media. However, if none of these ratios appeal to you, select “Custom” to choose your dimensions.
Step 7: Generate Images

It was time to generate! I hit the big yellow “Stylarize” button, and Dzine generated my images in seconds! They appeared in the right panel.

The results blew me away! All four images looked incredibly realistic. I double-clicked the image I liked most and placed it on my canvas.
Step 8: Make Edits
This photo looks great, but I wanted to take things further and try some of Dzine's AI's editing tools. I wanted to see if I could change the color of one of the flowers!

All of my AI image editing tools were on the left navigation bar. I selected the “Local Edit” tool to change an element in my photo.

At the bottom of the canvas were some tool options: Lasso, Brush, and Auto. As someone with experience using Photoshop, all these tools felt familiar!
I selected the “Auto” tool and clicked on the flower I wanted to change.

Next, in the Prompt field, I described what I wanted Dzine to do. I wrote “Red flower” as my description, kept everything on default, and selected “Stylarize.”

Seconds later, Dzine generated four red flower variations in the right panel! I double-clicked on the flower I liked most to replace the original one and was pleased with its authenticity. Dzine maintained the image resolution and only changed the element that I asked it to.


